(→Routes: added route) |
RealJonathing (talk | contribs) m (funny skeleton description change) |
||
| (43 intermediate revisions by 10 users not shown) | |||
| Line 1: | Line 1: | ||
| + | Bosses are a much stronger variant of the [[Enemies]]. They have high health, high damage, and many attacks. They are also partly resistant to [[Status Effects]]: for example, negative effects inflicted on them expire 20% faster than normal. |
||
| ⚫ | |||
| ⚫ | There are currently eight bosses in the game: the [[The Concierge|Concierge]], [[Conjunctivius]], [[Mama Tick]]{{DLC|TBS}}, the [[The Time Keeper|Time Keeper]], the [[The Giant|Giant]]{{DLC|RotG}}, the [[The Scarecrow|Scarecrow]]{{DLC|FF}}, the [[The Hand of the King|Hand of the King]], and a [[The Collector (5 BSC)|5 BSC exclusive boss]]{{DLC|RotG}}. |
||
| ⚫ | |||
| − | As the first boss, the player may find one of these three, depending on the path that they take. |
||
| ⚫ | |||
=== [[The Concierge]] === |
=== [[The Concierge]] === |
||
| − | The first boss in the game |
+ | The Concierge is first tier 1 boss in the game. He is encountered on the [[Black Bridge]]. |
| − | [[File:The Concierge.png| |
+ | [[File:The Concierge.png|300x300px]] |
| − | = |
+ | {{fake heading|sub=4|Routes}} |
'''Main''' |
'''Main''' |
||
* [[Prisoners' Quarters]] > [[Promenade of the Condemned]] > [[Ramparts]] > [[Black Bridge]] |
* [[Prisoners' Quarters]] > [[Promenade of the Condemned]] > [[Ramparts]] > [[Black Bridge]] |
||
| + | |||
| ⚫ | |||
| + | '''Alternate''' |
||
| ⚫ | |||
| − | * [[Prisoners' Quarters]] > [[Promenade of the Condemned]] |
+ | * [[Prisoners' Quarters]] > [[Promenade of the Condemned]] {{Rune|tele}} > [[Ossuary]] > [[Black Bridge]] |
| − | * [[Prisoners' Quarters]] [[ |
+ | * [[Prisoners' Quarters]] > [[Promenade of the Condemned]] {{Rune|spider}} > [[Prison Depths]] > [[Ossuary]] > [[Black Bridge]] |
| ⚫ | |||
| + | |||
'''Higher BSC''' |
'''Higher BSC''' |
||
| − | * [[Prisoners' Quarters]] |
+ | * [[Prisoners' Quarters]] {{Rune|vine}} > [[Toxic Sewers]] {{Rune|spider}} > [[Corrupted Prison]] [[File:BSCI Icon.png|link=Boss Stem Cells]] > [[Ramparts]] > [[Black Bridge]] |
| + | |||
'''DLC''' |
'''DLC''' |
||
| − | * [[Prisoners' Quarters]] |
+ | * [[Prisoners' Quarters]] {{Rune|Tele}} > [[Dilapidated Arboretum]]{{DLC|TBS}} > [[Ramparts]] > [[Black Bridge]] |
| − | * [[Prisoners' Quarters]] |
+ | * [[Prisoners' Quarters]] {{Rune|Tele}} > [[Dilapidated Arboretum]]{{DLC|TBS}} {{Rune|spider}} > [[Prison Depths]] > [[Ossuary]] > [[Black Bridge]] |
=== [[Conjunctivius]] === |
=== [[Conjunctivius]] === |
||
| − | Conjunctivius is the second tier 1 boss in the game and is an |
+ | Conjunctivius is the second tier 1 boss in the game and is an alternative to the Concierge. She is encountered in the [[Insufferable Crypt]], in which main path requires the {{Rune|ram|1}}. |
| − | [[File:Conjunctivius.png| |
+ | [[File:Conjunctivius.png|300x300px]] |
| − | = |
+ | {{fake heading|sub=4|Routes}} |
'''Main''' |
'''Main''' |
||
| − | * [[Prisoners' Quarters]] |
+ | * [[Prisoners' Quarters]] {{Rune|vine}} > [[Toxic Sewers]] {{Rune|ram}} > [[Ancient Sewers]] > [[Insufferable Crypt]] |
| + | |||
| ⚫ | |||
| + | '''Alternate''' |
||
| − | * [[Prisoners' Quarters]] > [[ |
+ | * [[Prisoners' Quarters]] {{Rune|vine}} > [[Toxic Sewers]] {{Rune|spider}} > [[Corrupted Prison]] > [[Ancient Sewers]] > [[Insufferable Crypt]] |
| + | |||
'''Higher BSC''' |
'''Higher BSC''' |
||
| − | * [[Prisoners' Quarters]] [[ |
+ | * [[Prisoners' Quarters]] > [[Promenade of the Condemned]] {{Rune|spider}} > [[Prison Depths]] [[File:BSCI Icon.png|link=Boss Stem Cells]] > [[Ancient Sewers]] > [[Insufferable Crypt]] |
| ⚫ | |||
* [[Prisoners' Quarters]] > [[Promenade of the Condemned]] > [[Ramparts]] [[File:BSCIII Icon.png]] > [[Insufferable Crypt]] |
* [[Prisoners' Quarters]] > [[Promenade of the Condemned]] > [[Ramparts]] [[File:BSCIII Icon.png]] > [[Insufferable Crypt]] |
||
| + | * [[Prisoners' Quarters]] {{Rune|vine}} > [[Toxic Sewers]] > [[Ramparts]] [[File:BSCIII Icon.png]] > [[Insufferable Crypt]] |
||
| + | |||
'''DLC''' |
'''DLC''' |
||
| − | * [[Prisoners' Quarters]] |
+ | * [[Prisoners' Quarters]] {{Rune|tele}} > [[Dilapidated Arboretum]]{{DLC|TBS}} > [[Ramparts]] [[File:BSCIII Icon.png]] > [[Insufferable Crypt]] |
=== [[Mama Tick]]{{DLC|TBS}} === |
=== [[Mama Tick]]{{DLC|TBS}} === |
||
| − | + | Mama Tick is the third tier 1 boss and is an alternative to the Concierge. She is encountered in the [[Nest]]{{DLC|TBS}}, in which main path requires the {{Rune|tele|1}}. |
|
| − | + | Her fight can be skipped if the player sacrifices {{Item|Mushroom Boi!}}{{DLC|TBS}} in the [[Morass of the Banished]]{{DLC|TBS}}. However, attacking her eye when it pops above the water will re-initiate the fight. |
|
| + | Requires the ''[[Bad Seed DLC]]''. |
||
| ⚫ | |||
| ⚫ | |||
| ⚫ | |||
| + | |||
| + | {{fake heading|sub=4|Routes}} |
||
'''Main''' |
'''Main''' |
||
| − | * [[Prisoners' Quarters]] |
+ | * [[Prisoners' Quarters]] {{Rune|tele}} > [[Dilapidated Arboretum]]{{DLC|TBS}} > [[Morass of the Banished]]{{DLC|TBS}} > [[Nest]]{{DLC|TBS}} |
| + | |||
| − | ''' Optional''' |
||
| + | '''Alternate''' |
||
| − | * [[Prisoners' Quarters]] [[File:Teleportation Rune Mini Icon.png|24x24px|link=Runes]] > [[Dilapidated Arboretum]] [[File:Spider Rune Mini Icon.png|24x24px|link=Runes]] > [[Prison Depths]] > [[Morass of the Banished]] > [[Nest]] |
||
| − | * [[Prisoners' Quarters]] > [[ |
+ | * [[Prisoners' Quarters]] {{Rune|tele}} > [[Dilapidated Arboretum]]{{DLC|TBS}} {{Rune|spider}} > [[Prison Depths]] > [[Morass of the Banished]]{{DLC|TBS}} > [[Nest]]{{DLC|TBS}} |
| − | * [[Prisoners' Quarters]] > [[Promenade of the Condemned]] |
+ | * [[Prisoners' Quarters]] > [[Promenade of the Condemned]] {{Rune|tele}} > [[Morass of the Banished]]{{DLC|TBS}} > [[Nest]]{{DLC|TBS}} |
| ⚫ | |||
== Second bosses == |
== Second bosses == |
||
=== [[The Time Keeper]] === |
=== [[The Time Keeper]] === |
||
| − | + | The Time Keeper is the first tier 2 boss in the game. She is encountered in the [[Clock Room]]. |
|
| − | [[File:The Time Keeper.png| |
+ | [[File:The Time Keeper.png|300x300px]] |
| + | {{fake heading|sub=4|Routes}} |
||
| ⚫ | |||
| ⚫ | |||
| − | Unlocked by opening the gate to the [[Cavern]] in the [[Graveyard]] (requires [[Keys|Cavern Key]]). |
||
| + | * [[Black Bridge]] > [[Stilt Village]] > [[Clock Tower]] > [[Clock Room]] |
||
| + | |||
| + | '''Alternate''' |
||
| + | * [[Black Bridge]] > [[Stilt Village]] {{Rune|tele}} > [[Forgotten Sepulcher]] > [[Clock Room]] |
||
| + | * [[Black Bridge]] {{Rune|spider}} > [[Slumbering Sanctuary]] > [[Clock Tower]] > [[Clock Room]] |
||
| + | * [[Black Bridge]] {{Rune|spider}} > [[Slumbering Sanctuary]] > [[Forgotten Sepulcher]] > [[Clock Room]] |
||
| + | * [[Insufferable Crypt]] > [[Slumbering Sanctuary]] > [[Clock Tower]] > [[Clock Room]] |
||
| + | * [[Insufferable Crypt]] > [[Slumbering Sanctuary]] > [[Forgotten Sepulcher]] > [[Clock Room]] |
||
| + | * [[Insufferable Crypt]] {{Rune|spider}} > [[Graveyard]] > [[Forgotten Sepulcher]] > [[Clock Room]] |
||
| + | |||
| ⚫ | |||
| + | * [[Nest]]{{DLC|TBS}} > [[Stilt Village]] > [[Clock Tower]] > [[Clock Room]] |
||
| + | * [[Nest]]{{DLC|TBS}} > [[Stilt Village]] {{Rune|tele}} > [[Forgotten Sepulcher]] > [[Clock Room]] |
||
| + | * [[Nest]]{{DLC|TBS}} {{Rune|spider}} > [[Graveyard]] > [[Forgotten Sepulcher]] > [[Clock Room]] |
||
| + | * [[Black Bridge]] > [[Fractured Shrines]]{{DLC|FF}} > [[Clock Tower]] > [[Clock Room]] |
||
| + | * [[Black Bridge]] > [[Fractured Shrines]]{{DLC|FF}} {{Rune|tele}} > [[Forgotten Sepulcher]] > [[Clock Room]] |
||
| + | * [[Nest]]{{DLC|TBS}} > [[Fractured Shrines]]{{DLC|FF}} > [[Clock Tower]] > [[Clock Room]] |
||
| + | * [[Nest]]{{DLC|TBS}} > [[Fractured Shrines]]{{DLC|FF}} {{Rune|tele}} > [[Forgotten Sepulcher]] > [[Clock Room]] |
||
| ⚫ | |||
| − | The Giant awakens after the player kills the Hand of the King, where it busts down the door after the starting items, where the cavern key lies. |
||
| + | The Giant is a special tier 2 boss in the game. He is encountered in [[Guardian's Haven]]{{DLC|RotG}}, the paths of which are unlocked by opening the gate to the [[Cavern]]{{DLC|RotG}} in the [[Graveyard]] (requires {{Pickup|Cavern Key}}{{DLC|RotG}}). |
||
| + | His skeleton rests in the [[Prisoners' Quarters]] until the player beats the [[The Hand of the King|Hand of the King]]. Once awakened, he busts down the door after the starting items, where the {{Pickup|Cavern Key}}{{DLC|RotG}} can be found. If the player follows him, a small cutscene will play, then a key can be found to permanently unlock the [[Cavern]] entrance from the [[Graveyard]]. {{Pickup|Cavern Key}}{{DLC|RotG}} must be used on the door for it to remain open. |
||
| − | Found in the [[Guardian's Haven]]. Can be reached through either the [[Cavern]] or the [[Forgotten Sepulcher]] (2 BSC+ door). |
||
Requires the ''[[Rise of the Giant DLC]]''. |
Requires the ''[[Rise of the Giant DLC]]''. |
||
| − | [[File:The Giant.png| |
+ | [[File:The Giant.png|300x300px]] |
| + | |||
| + | {{fake heading|sub=4|Routes}} |
||
| + | '''Main''' |
||
| + | * [[Insufferable Crypt]] {{Rune|spider}} > [[Graveyard]] [[File:Cavern Key.png|20px|link=Keys]] > [[Cavern]]{{DLC|RotG}} > [[Guardian's Haven]]{{DLC|RotG}} |
||
| + | |||
| + | '''Higher BSC''' |
||
| + | * [[Insufferable Crypt]] {{Rune|spider}} > [[Graveyard]] > [[Forgotten Sepulcher]] [[File:BSCII Icon.png|link=Boss Stem Cells]]{{efn|name=Giant kill}} > [[Guardian's Haven]]{{DLC|RotG}} |
||
| + | * [[Insufferable Crypt]] > [[Slumbering Sanctuary]] [[File:BSCII Icon.png|link=Boss Stem Cells]]{{efn|name=Giant kill}} > [[Cavern]]{{DLC|RotG}} > [[Guardian's Haven]]{{DLC|RotG}} |
||
| + | * [[Insufferable Crypt]] > [[Slumbering Sanctuary]] > [[Forgotten Sepulcher]] [[File:BSCII Icon.png|link=Boss Stem Cells]]{{efn|name=Giant kill}} > [[Guardian's Haven]]{{DLC|RotG}} |
||
| + | * [[Black Bridge]] {{Rune|spider}} > [[Slumbering Sanctuary]] [[File:BSCII Icon.png|link=Boss Stem Cells]]{{efn|name=Giant kill}} > [[Cavern]]{{DLC|RotG}} > [[Guardian's Haven]]{{DLC|RotG}} |
||
| + | * [[Black Bridge]] {{Rune|spider}} > [[Slumbering Sanctuary]] > [[Forgotten Sepulcher]] [[File:BSCII Icon.png|link=Boss Stem Cells]]{{efn|name=Giant kill}} > [[Guardian's Haven]]{{DLC|RotG}} |
||
| + | * [[Black Bridge]] > [[Stilt Village]] {{Rune|tele}} > [[Forgotten Sepulcher]] [[File:BSCII Icon.png|link=Boss Stem Cells]]{{efn|name=Giant kill}} > [[Guardian's Haven]]{{DLC|RotG}} |
||
| + | |||
| + | '''DLC''' |
||
| + | * [[Nest]]{{DLC|TBS}} {{Rune|spider}} > [[Graveyard]] [[File:Cavern Key.png|20px|link=Keys]] > [[Cavern]]{{DLC|RotG}} > [[Guardian's Haven]]{{DLC|RotG}} |
||
| + | * [[Nest]]{{DLC|TBS}} {{Rune|spider}} > [[Graveyard]] > [[Forgotten Sepulcher]] [[File:BSCII Icon.png|link=Boss Stem Cells]]{{efn|name=Giant kill}} > [[Guardian's Haven]]{{DLC|RotG}} |
||
| + | * [[Nest]]{{DLC|TBS}} > [[Stilt Village]] {{Rune|tele}} > [[Forgotten Sepulcher]] [[File:BSCII Icon.png|link=Boss Stem Cells]]{{efn|name=Giant kill}} > [[Guardian's Haven]]{{DLC|RotG}} |
||
| + | * [[Black Bridge]] > [[Fractured Shrines]]{{DLC|FF}} {{Rune|tele}} > [[Forgotten Sepulcher]] [[File:BSCII Icon.png|link=Boss Stem Cells]]{{efn|name=Giant kill}} > [[Guardian's Haven]]{{DLC|RotG}} |
||
| + | * [[Nest]]{{DLC|TBS}} > [[Fractured Shrines]]{{DLC|FF}} {{Rune|tele}} > [[Forgotten Sepulcher]] [[File:BSCII Icon.png|link=Boss Stem Cells]]{{efn|name=Giant kill}} > [[Guardian's Haven]]{{DLC|RotG}} |
||
| + | |||
| + | === [[The Scarecrow]]{{DLC|FF}} === |
||
| + | The Scarecrow is the second tier 2 boss in the game and is an alternative to the Time Keeper. He is encountered in the [[Mausoleum]]{{DLC|FF}}, the paths of which requires wearing the [[File:Cultist_Outfit_Icon.png|20px|link=Outfits]] [[Outfits|Cultist Outfit]]{{DLC|FF}} to open the gate to the [[Undying Shores]]{{DLC|FF}} for the first time. |
||
| + | |||
| + | Requires the ''[[Fatal Falls DLC]]''. |
||
| + | |||
| + | [[File:The Scarecrow.png|300x300px]] |
||
| + | |||
| + | {{fake heading|sub=4|Routes}} |
||
| + | '''Main''' |
||
| + | * [[Black Bridge]] > [[Fractured Shrines]]{{DLC|FF}} [[File:Cultist_Outfit_Icon.png|20px|link=Outfits]] > [[Undying Shores]]{{DLC|FF}} > [[Mausoleum]]{{DLC|FF}} |
||
| + | |||
| + | '''Alternate''' |
||
| + | * [[Black Bridge]] > [[Stilt Village]] > [[Undying Shores]]{{DLC|FF}}{{efn|name=Cultist outfit}} > [[Mausoleum]]{{DLC|FF}} |
||
| + | * [[Insufferable Crypt]] {{Rune|spider}} > [[Graveyard]] > [[Undying Shores]]{{DLC|FF}}{{efn|name=Cultist outfit}} > [[Mausoleum]]{{DLC|FF}} |
||
| + | |||
| + | '''DLC''' |
||
| + | * [[Black Bridge]] {{Rune|spider}} > [[Slumbering Sanctuary]] [[File:BSCII Icon.png|link=Boss Stem Cells]]{{efn|name=Giant kill}} > [[Cavern]]{{DLC|RotG}} > [[Mausoleum]]{{DLC|FF}} |
||
| + | * [[Insufferable Crypt]] {{Rune|spider}} > [[Graveyard]] [[File:Cavern Key.png|20px|link=Keys]] > [[Cavern]]{{DLC|RotG}} > [[Mausoleum]]{{DLC|FF}} |
||
| + | * [[Insufferable Crypt]] > [[Slumbering Sanctuary]] [[File:BSCII Icon.png|link=Boss Stem Cells]]{{efn|name=Giant kill}} > [[Cavern]]{{DLC|RotG}} > [[Mausoleum]]{{DLC|FF}} |
||
| + | * [[Nest]]{{DLC|TBS}} > [[Fractured Shrines]]{{DLC|FF}} [[File:Cultist_Outfit_Icon.png|20px|link=Outfits]] > [[Undying Shores]]{{DLC|FF}} > [[Mausoleum]]{{DLC|FF}} |
||
| + | * [[Nest]]{{DLC|TBS}} {{Rune|spider}} > [[Graveyard]] > [[Undying Shores]]{{DLC|FF}}{{efn|name=Cultist outfit}} > [[Mausoleum]]{{DLC|FF}} |
||
| + | * [[Nest]]{{DLC|TBS}} > [[Stilt Village]] > [[Undying Shores]]{{DLC|FF}}{{efn|name=Cultist outfit}} > [[Mausoleum]]{{DLC|FF}} |
||
| + | * [[Nest]]{{DLC|TBS}} {{Rune|spider}} > [[Graveyard]] [[File:Cavern Key.png|20px|link=Keys]] > [[Cavern]]{{DLC|RotG}} > [[Mausoleum]]{{DLC|FF}} |
||
== Third boss == |
== Third boss == |
||
=== [[The Hand of the King]] === |
=== [[The Hand of the King]] === |
||
| − | The final boss of the game on 4 BSC and less. |
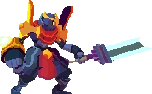
+ | The Hand of the King is the final boss of the game on 4 BSC and less. He is encountered in the [[Throne Room]]. |
| − | [[File:The Hand of the King.png| |
+ | [[File:The Hand of the King.png|300x300px]] |
| + | |||
| + | {{fake heading|sub=4|Routes}} |
||
| + | '''Main''' |
||
| + | * [[Clock Room]] > [[High Peak Castle]] > [[Throne Room]] |
||
| + | |||
| + | '''Alternate''' |
||
| + | * [[Clock Room]] > [[Derelict Distillery]] > [[Throne Room]] |
||
| + | |||
| + | '''DLC''' |
||
| + | * [[Guardian's Haven]]{{DLC|RotG}} > [[High Peak Castle]] > [[Throne Room]] |
||
| + | * [[Guardian's Haven]]{{DLC|RotG}} > [[Derelict Distillery]] > [[Throne Room]] |
||
| + | * [[Guardian's Haven]]{{DLC|RotG}} > [[Throne Room]] |
||
| + | * [[The Mausoleum]]{{DLC|FF}} > [[High Peak Castle]] > [[Throne Room]] |
||
| + | * [[The Mausoleum]]{{DLC|FF}} > [[Derelict Distillery]] > [[Throne Room]] |
||
== Fourth boss == |
== Fourth boss == |
||
{{SpoilerTag |
{{SpoilerTag |
||
| − | |{{= |
+ | |{{fake heading|sub=3|[[The Collector (5 BSC)|The Collector]]{{DLC|RotG}}}} |
| − | The true final boss of the game. |
+ | The Collector is the true final boss of the game. He is encountered in the [[Observatory]]{{DLC|RotG}}, which can only be reached with [[File:BCV_Icon.png|link=Boss Stem Cells]] 5 BSC active. |
| + | |||
Requires the ''[[Rise of the Giant DLC]]''. |
Requires the ''[[Rise of the Giant DLC]]''. |
||
| + | |||
| + | [[File:The Collector (Boss).png|300x300px]] |
||
| + | |||
| + | '''Main''' |
||
| + | * [[Throne Room]] [[File:BCV_Icon.png|link=Boss Stem Cells]] > [[Astrolab]]{{DLC|RotG}} > [[Observatory]]{{DLC|RotG}} |
||
| + | }} |
||
| + | |||
| ⚫ | |||
| + | {{Notelist|refs= |
||
| + | {{efn|name=Giant kill|Requires killing the [[Giant]]{{DLC|RotG}} at least once.}} |
||
| + | {{efn|name=Cultist outfit|Requires unlocking the [[Undying Shores]]{{DLC|FF}} with the [[File:Cultist_Outfit_Icon.png|20px|link=Outfits]] [[Outfits|Cultist Outfit]]{{DLC|FF}}.}} |
||
}} |
}} |
||
{{Nav}} |
{{Nav}} |
||
| + | |||
| − | __NOTOC__ |
||
| + | [[Category:Bosses]] |
||
| + | |||
| + | [[ru:Боссы]] |
||
Revision as of 16:27, 23 February 2021
Bosses are a much stronger variant of the Enemies. They have high health, high damage, and many attacks. They are also partly resistant to Status Effects: for example, negative effects inflicted on them expire 20% faster than normal.
There are currently eight bosses in the game: the Concierge, Conjunctivius, Mama TickTBS, the Time Keeper, the GiantRotG, the ScarecrowFF, the Hand of the King, and a 5 BSC exclusive bossRotG.
First bosses
The Concierge
The Concierge is first tier 1 boss in the game. He is encountered on the Black Bridge.

Main
Alternate
- Prisoners' Quarters > Promenade of the Condemned
 > Ossuary > Black Bridge
 - Prisoners' Quarters > Promenade of the Condemned
 > Prison Depths > Ossuary > Black Bridge
 - Prisoners' Quarters > Toxic Sewers > Ramparts > Black Bridge
Higher BSC
DLC
- Prisoners' Quarters > Dilapidated ArboretumTBS > Ramparts > Black Bridge
- Prisoners' Quarters > Dilapidated ArboretumTBS > Prison Depths > Ossuary > Black Bridge
Conjunctivius
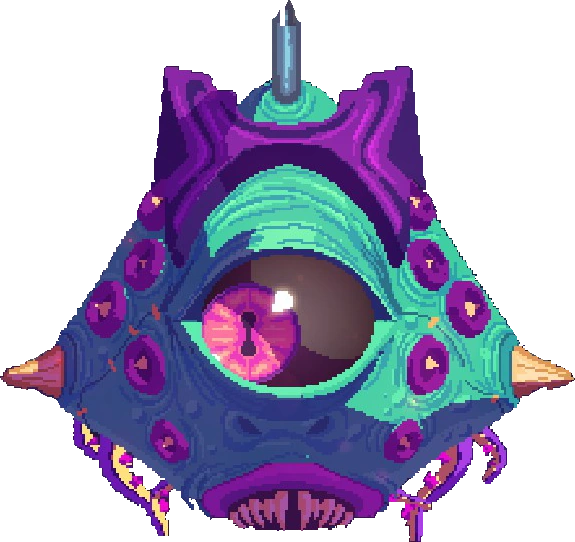
Conjunctivius is the second tier 1 boss in the game and is an alternative to the Concierge. She is encountered in the Insufferable Crypt, in which main path requires the ![]() Ram Rune.
Ram Rune.
Main
Alternate
Higher BSC
- Prisoners' Quarters > Promenade of the Condemned > Prison Depths > Ancient Sewers > Insufferable Crypt
- Prisoners' Quarters > Promenade of the Condemned > Ramparts > Insufferable Crypt
- Prisoners' Quarters > Toxic Sewers > Ramparts > Insufferable Crypt
DLC
Mama TickTBS
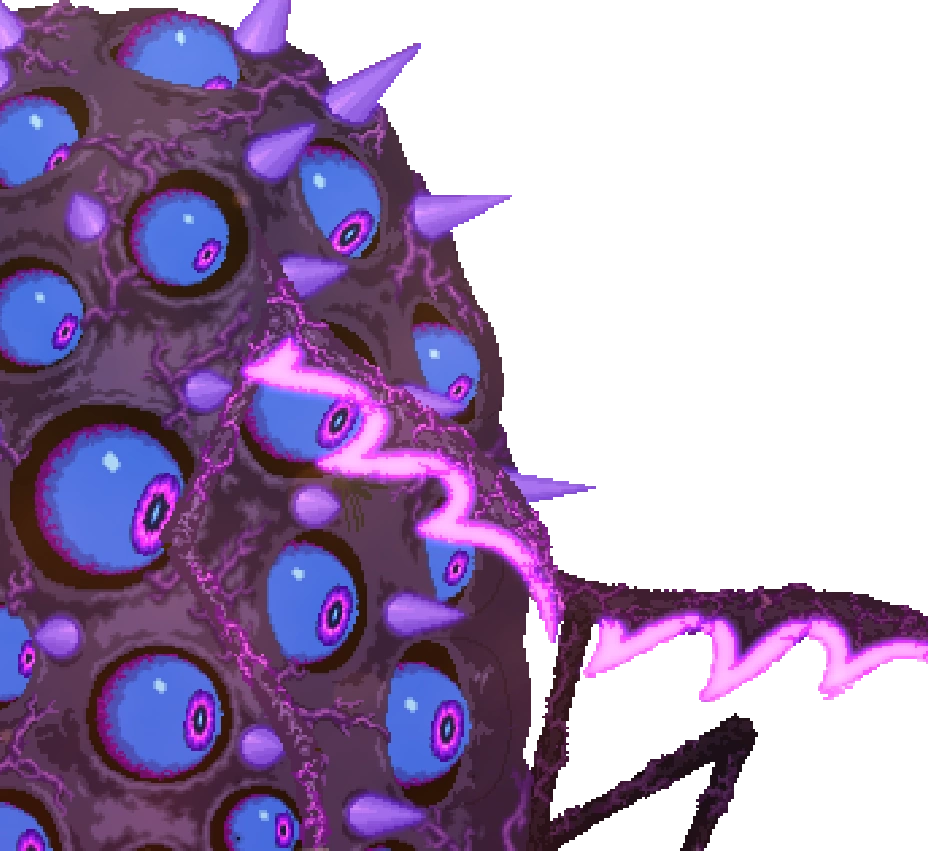
Mama Tick is the third tier 1 boss and is an alternative to the Concierge. She is encountered in the NestTBS, in which main path requires the ![]() Teleportation Rune.
Teleportation Rune.
Her fight can be skipped if the player sacrifices ![]() Mushroom Boi!TBS in the Morass of the BanishedTBS. However, attacking her eye when it pops above the water will re-initiate the fight.
Mushroom Boi!TBS in the Morass of the BanishedTBS. However, attacking her eye when it pops above the water will re-initiate the fight.
Requires the Bad Seed DLC.
Main
- Prisoners' Quarters > Dilapidated ArboretumTBS > Morass of the BanishedTBS > NestTBS
Alternate
- Prisoners' Quarters > Dilapidated ArboretumTBS > Prison Depths > Morass of the BanishedTBS > NestTBS
- Prisoners' Quarters > Promenade of the Condemned > Morass of the BanishedTBS > NestTBS
- Prisoners' Quarters > Promenade of the Condemned > Prison Depths > Morass of the BanishedTBS > NestTBS
Second bosses
The Time Keeper
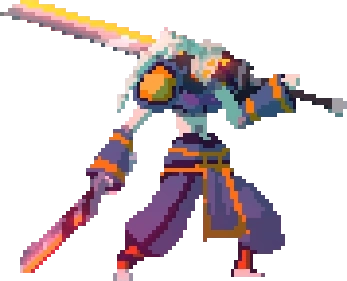
The Time Keeper is the first tier 2 boss in the game. She is encountered in the Clock Room.
Main
Alternate
- Black Bridge > Stilt Village > Forgotten Sepulcher > Clock Room
- Black Bridge > Slumbering Sanctuary > Clock Tower > Clock Room
- Black Bridge > Slumbering Sanctuary > Forgotten Sepulcher > Clock Room
- Insufferable Crypt > Slumbering Sanctuary > Clock Tower > Clock Room
- Insufferable Crypt > Slumbering Sanctuary > Forgotten Sepulcher > Clock Room
- Insufferable Crypt > Graveyard > Forgotten Sepulcher > Clock Room
DLC
- NestTBS > Stilt Village > Clock Tower > Clock Room
- NestTBS > Stilt Village > Forgotten Sepulcher > Clock Room
- NestTBS > Graveyard > Forgotten Sepulcher > Clock Room
- Black Bridge > Fractured ShrinesFF > Clock Tower > Clock Room
- Black Bridge > Fractured ShrinesFF > Forgotten Sepulcher > Clock Room
- NestTBS > Fractured ShrinesFF > Clock Tower > Clock Room
- NestTBS > Fractured ShrinesFF > Forgotten Sepulcher > Clock Room
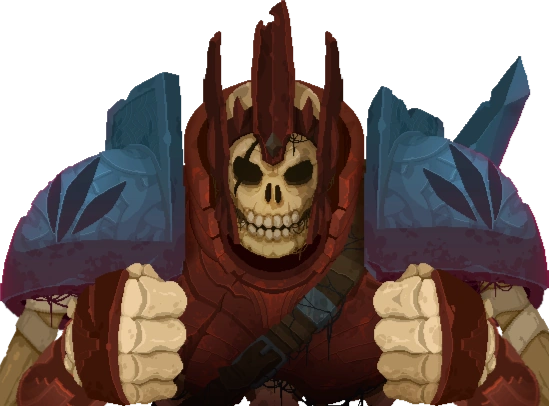
The GiantRotG
The Giant is a special tier 2 boss in the game. He is encountered in Guardian's HavenRotG, the paths of which are unlocked by opening the gate to the CavernRotG in the Graveyard (requires ![]() Cavern KeyRotG).
Cavern KeyRotG).
His skeleton rests in the Prisoners' Quarters until the player beats the Hand of the King. Once awakened, he busts down the door after the starting items, where the ![]() Cavern KeyRotG can be found. If the player follows him, a small cutscene will play, then a key can be found to permanently unlock the Cavern entrance from the Graveyard.
Cavern KeyRotG can be found. If the player follows him, a small cutscene will play, then a key can be found to permanently unlock the Cavern entrance from the Graveyard. ![]() Cavern KeyRotG must be used on the door for it to remain open.
Cavern KeyRotG must be used on the door for it to remain open.
Requires the Rise of the Giant DLC.
Main
- Insufferable Crypt > Graveyard > CavernRotG > Guardian's HavenRotG
Higher BSC
- Insufferable Crypt > Graveyard > Forgotten Sepulcher [a] > Guardian's HavenRotG
- Insufferable Crypt > Slumbering Sanctuary [a] > CavernRotG > Guardian's HavenRotG
- Insufferable Crypt > Slumbering Sanctuary > Forgotten Sepulcher [a] > Guardian's HavenRotG
- Black Bridge > Slumbering Sanctuary [a] > CavernRotG > Guardian's HavenRotG
- Black Bridge > Slumbering Sanctuary > Forgotten Sepulcher [a] > Guardian's HavenRotG
- Black Bridge > Stilt Village > Forgotten Sepulcher [a] > Guardian's HavenRotG
DLC
- NestTBS > Graveyard > CavernRotG > Guardian's HavenRotG
- NestTBS > Graveyard > Forgotten Sepulcher [a] > Guardian's HavenRotG
- NestTBS > Stilt Village > Forgotten Sepulcher [a] > Guardian's HavenRotG
- Black Bridge > Fractured ShrinesFF > Forgotten Sepulcher [a] > Guardian's HavenRotG
- NestTBS > Fractured ShrinesFF > Forgotten Sepulcher [a] > Guardian's HavenRotG
The ScarecrowFF
The Scarecrow is the second tier 2 boss in the game and is an alternative to the Time Keeper. He is encountered in the MausoleumFF, the paths of which requires wearing the ![]() Cultist OutfitFF to open the gate to the Undying ShoresFF for the first time.
Cultist OutfitFF to open the gate to the Undying ShoresFF for the first time.
Requires the Fatal Falls DLC.

Main
- Black Bridge > Fractured ShrinesFF > Undying ShoresFF > MausoleumFF
Alternate
- Black Bridge > Stilt Village > Undying ShoresFF[b] > MausoleumFF
- Insufferable Crypt > Graveyard > Undying ShoresFF[b] > MausoleumFF
DLC
- Black Bridge > Slumbering Sanctuary [a] > CavernRotG > MausoleumFF
- Insufferable Crypt > Graveyard > CavernRotG > MausoleumFF
- Insufferable Crypt > Slumbering Sanctuary [a] > CavernRotG > MausoleumFF
- NestTBS > Fractured ShrinesFF > Undying ShoresFF > MausoleumFF
- NestTBS > Graveyard > Undying ShoresFF[b] > MausoleumFF
- NestTBS > Stilt Village > Undying ShoresFF[b] > MausoleumFF
- NestTBS > Graveyard > CavernRotG > MausoleumFF
Third boss
The Hand of the King
The Hand of the King is the final boss of the game on 4 BSC and less. He is encountered in the Throne Room.
Main
Alternate
DLC
- Guardian's HavenRotG > High Peak Castle > Throne Room
- Guardian's HavenRotG > Derelict Distillery > Throne Room
- Guardian's HavenRotG > Throne Room
- The MausoleumFF > High Peak Castle > Throne Room
- The MausoleumFF > Derelict Distillery > Throne Room
Fourth boss

Notes
| Navigation wiki |
|---|